How to install and configure the ID-150
We recommend that customers add the following expectation for the following paths for their antivirus - both for the PassagePoint server as well as all machines that install PassagePoint clients. See Kb article on anti virus exclusions.
https://support.stopware.com/portal/en/kb/articles/passagepont-anti-virus-exclusions
The following folders should have full rights for the users:
PPGlobal
Acuant
CSActApp
Give Full Rights to the PPGlobal Folder
• Navigate to the “C” drive, right click “PPGlobal”
• Select Properties>> click "Edit"
• Select Users at the bottom and check "full control" at the bottom>> click "OK"
Give Full Rights to the Acuant Folder
• Navigate to “C:\Program Files (x86)”, right click “Acuant”
• Select Properties>> click "Edit"
• Select Users at the bottom and check "full control" at the bottom>> click "OK"
Enable hidden folders
• Open Windows File Explorer
• Click view on top
• Check "hidden items"
Give Full Rights to the ProgramData Folder (This folder stores the activation key file)
• Navigate to to "C:\Program Data right click "CSActAPP"
• Select Properties>> click "Edit"
• Select Users at the bottom and check "full control" at the bottom>> click "OK"
Instructions:
1) Activate the Activation key
• Navigate to C:\Program Files (x86)\Acuant\SDK >> right click "activation.exe" and run as administrator
• Enter the "activation key" click "Activate on Server"
If the Acuant folder is missing, see KB article below to reinstall the drivers:
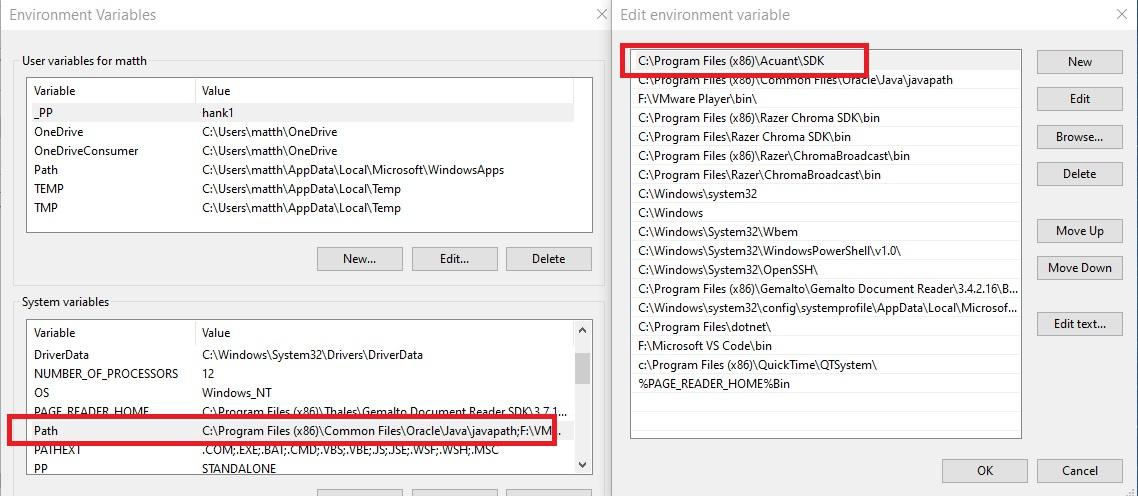
2) Update the environment variables
• Navigate to Windows Start> type "Edit the system environment variables" >> Select "Edit the system environment variables" >>In the “System Variables” pane >> Select the “Path” >> Click Edit and move the "C:\Program files (x86)\Acuant\SDK" to the top >> click ok
- If the environment variable is not available. See KB article to reinstall the drivers.
4) Test the scanner outside of PassagePoint using the utility below.
• Please download this test utility >> http://downloads.stopware.com/updates/AcuantSDK/IdTestUtility.zip
• Extract it into its own folder
• run the idtestutility.exe >> choose option 4
• The scanner name should appear at the bottom >> device(s) connected:
• Place a Driver License into the Scanner >> Click scan ID >> the scanner should pull the ID through and perform the scan
7) Turn Off Windows Power Saving Features
Disable Sleep, Hybrid Sleep and USB Selective Suspend:
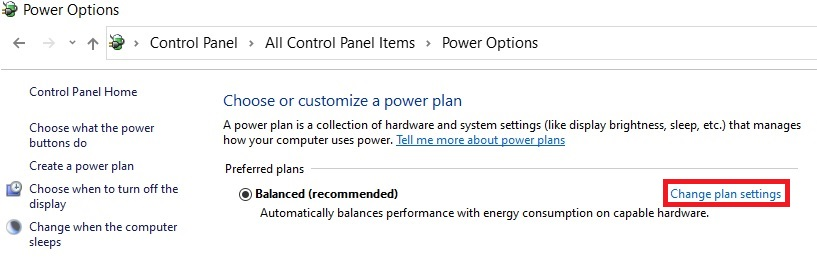
• Open Control Panel.
• Click on Power Options.
• Under "Preferred plans," click the Change plan settings link for the plan you're currently using. ...
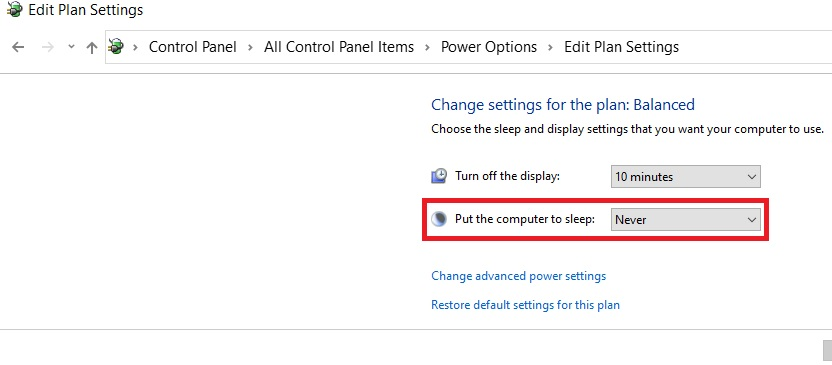
• Under “Put the computer to sleep” select Never
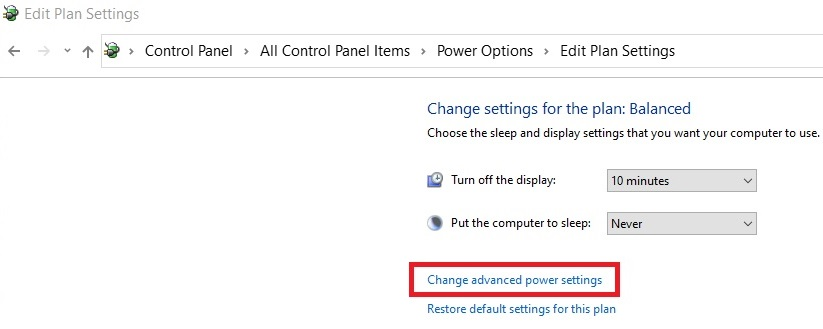
• Click the Change advanced power settings link.
• Click the + sign next to "Sleep"
• Click the + sign next to "Allow hybrid sleep" and change setting to "off" (Skip this step if Hybrid Sleep is not available)
• Click OK.

• Click the + sign next to "USB" settings
• Expand USB selective suspend setting > Change dropdown to Disabled.
• Click OK

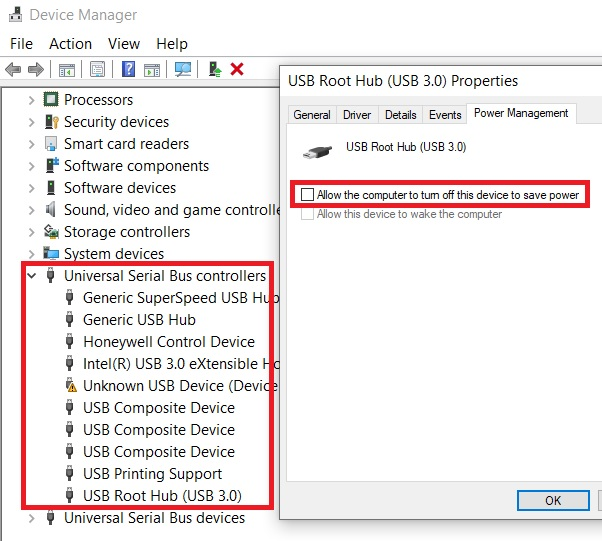
Turn Off USB Power Save Feature:
• Open Control Panel
• Click on Device Manager
• Scroll down and select Universal Serial Bus Controller > Expand
• Select USB Root Hub > Right Click > Properties > Power Management
• Uncheck “Allow the computer to turn off this device to save power”
• OK to Save.
• Make sure you perform this step for all USB Root Hub options
8) Add theID-150 to PassagePoint
• Right Click PassagePoint Client Icon and run as Administrator
• Login to PassagePoint >> Add the scanner
• Navigate to Home> Station Preferences> Click add at the bottom
• Select Business cards & Id Scanners > Click Next
• Select Card Scanning Solutions > Click Next
• Select ID-150 > Click Next
• Enter the Scanner Name
• Select the "Auto Detect Region", "Default Country" and "Default State"
• Update the photo brightness as needed. The higher the number the brighter, the lower the darker the scan will be.
• Select 600DPI > Click Finish
Please give PassagePoint 30secs - 1min to communicate with the scanner then Proceed to the next steps.
9) Add the Driver License Parser to PassagePoint
• In Station Preferences> Click add at the bottom
• Select Magnetic Strip Readers > Select Driver license Parser
• Give the Driver License Parser a name
• Enter the Activation Key
• Click 'Test'
• PassagePoint should return a success prompt
• Click Finish
10) Testing the Scanner in PassagePoint
• Navigate to Home> Visit Center> Rapid Registration > Visit Entry
• Click ID / License Icon > Place an ID / DL into the scanner face down
Related Articles
How to Install and Configure the CR1100 with Parser key
How to Install and Configure the CR1100 (w/ Parser) Download and Install the CR1100 Driver Do not Plug in the CR1100. Please download the CR1100 Virtual Com driver from: http://downloads.stopware.com/updates/codereader/cr1100.zip Plug in the CR1100 ...How to install and configure the QS1000 & QS2000
How to install and configure the Gemalto QS1000 & QS2000 The scanner should be plugged in directly into the back of the PC into a USB 3.0 port. We recommend that customers add the following expectation for the following paths for their antivirus - ...How to install and configure the zebra ZD421
NOTE: If you connected your printer to the computer via USB before the installation, follow these recovery steps before printer driver installation - https://supportcommunity.zebra.com/s/article/000022027 Turn Off Windows Power Saving Features To ...To Disable Capturing of ID/DL Data
To disable Capturing of ID/DL Data • Navigate to Home > Configure System> Policy Manager> Select Screen Policy • On the right hand side Expand Default Screen Policies > Expand Visit Center > Select 'CaptureID' > Click 'Edit' To disable capturing of ...How to Install and Configure the CR1500
Download and Install the CR1500 Driver Please do not plug in the CR1500. Please download the CR1500 Virtual Com driver and Cortex tools from: https://downloads.stopware.com/updates/codereader/cr1500.zip Install the driver Plug in the CR1500 Scan the ...